Jasper's Retro Internet Radio - Feb-2018
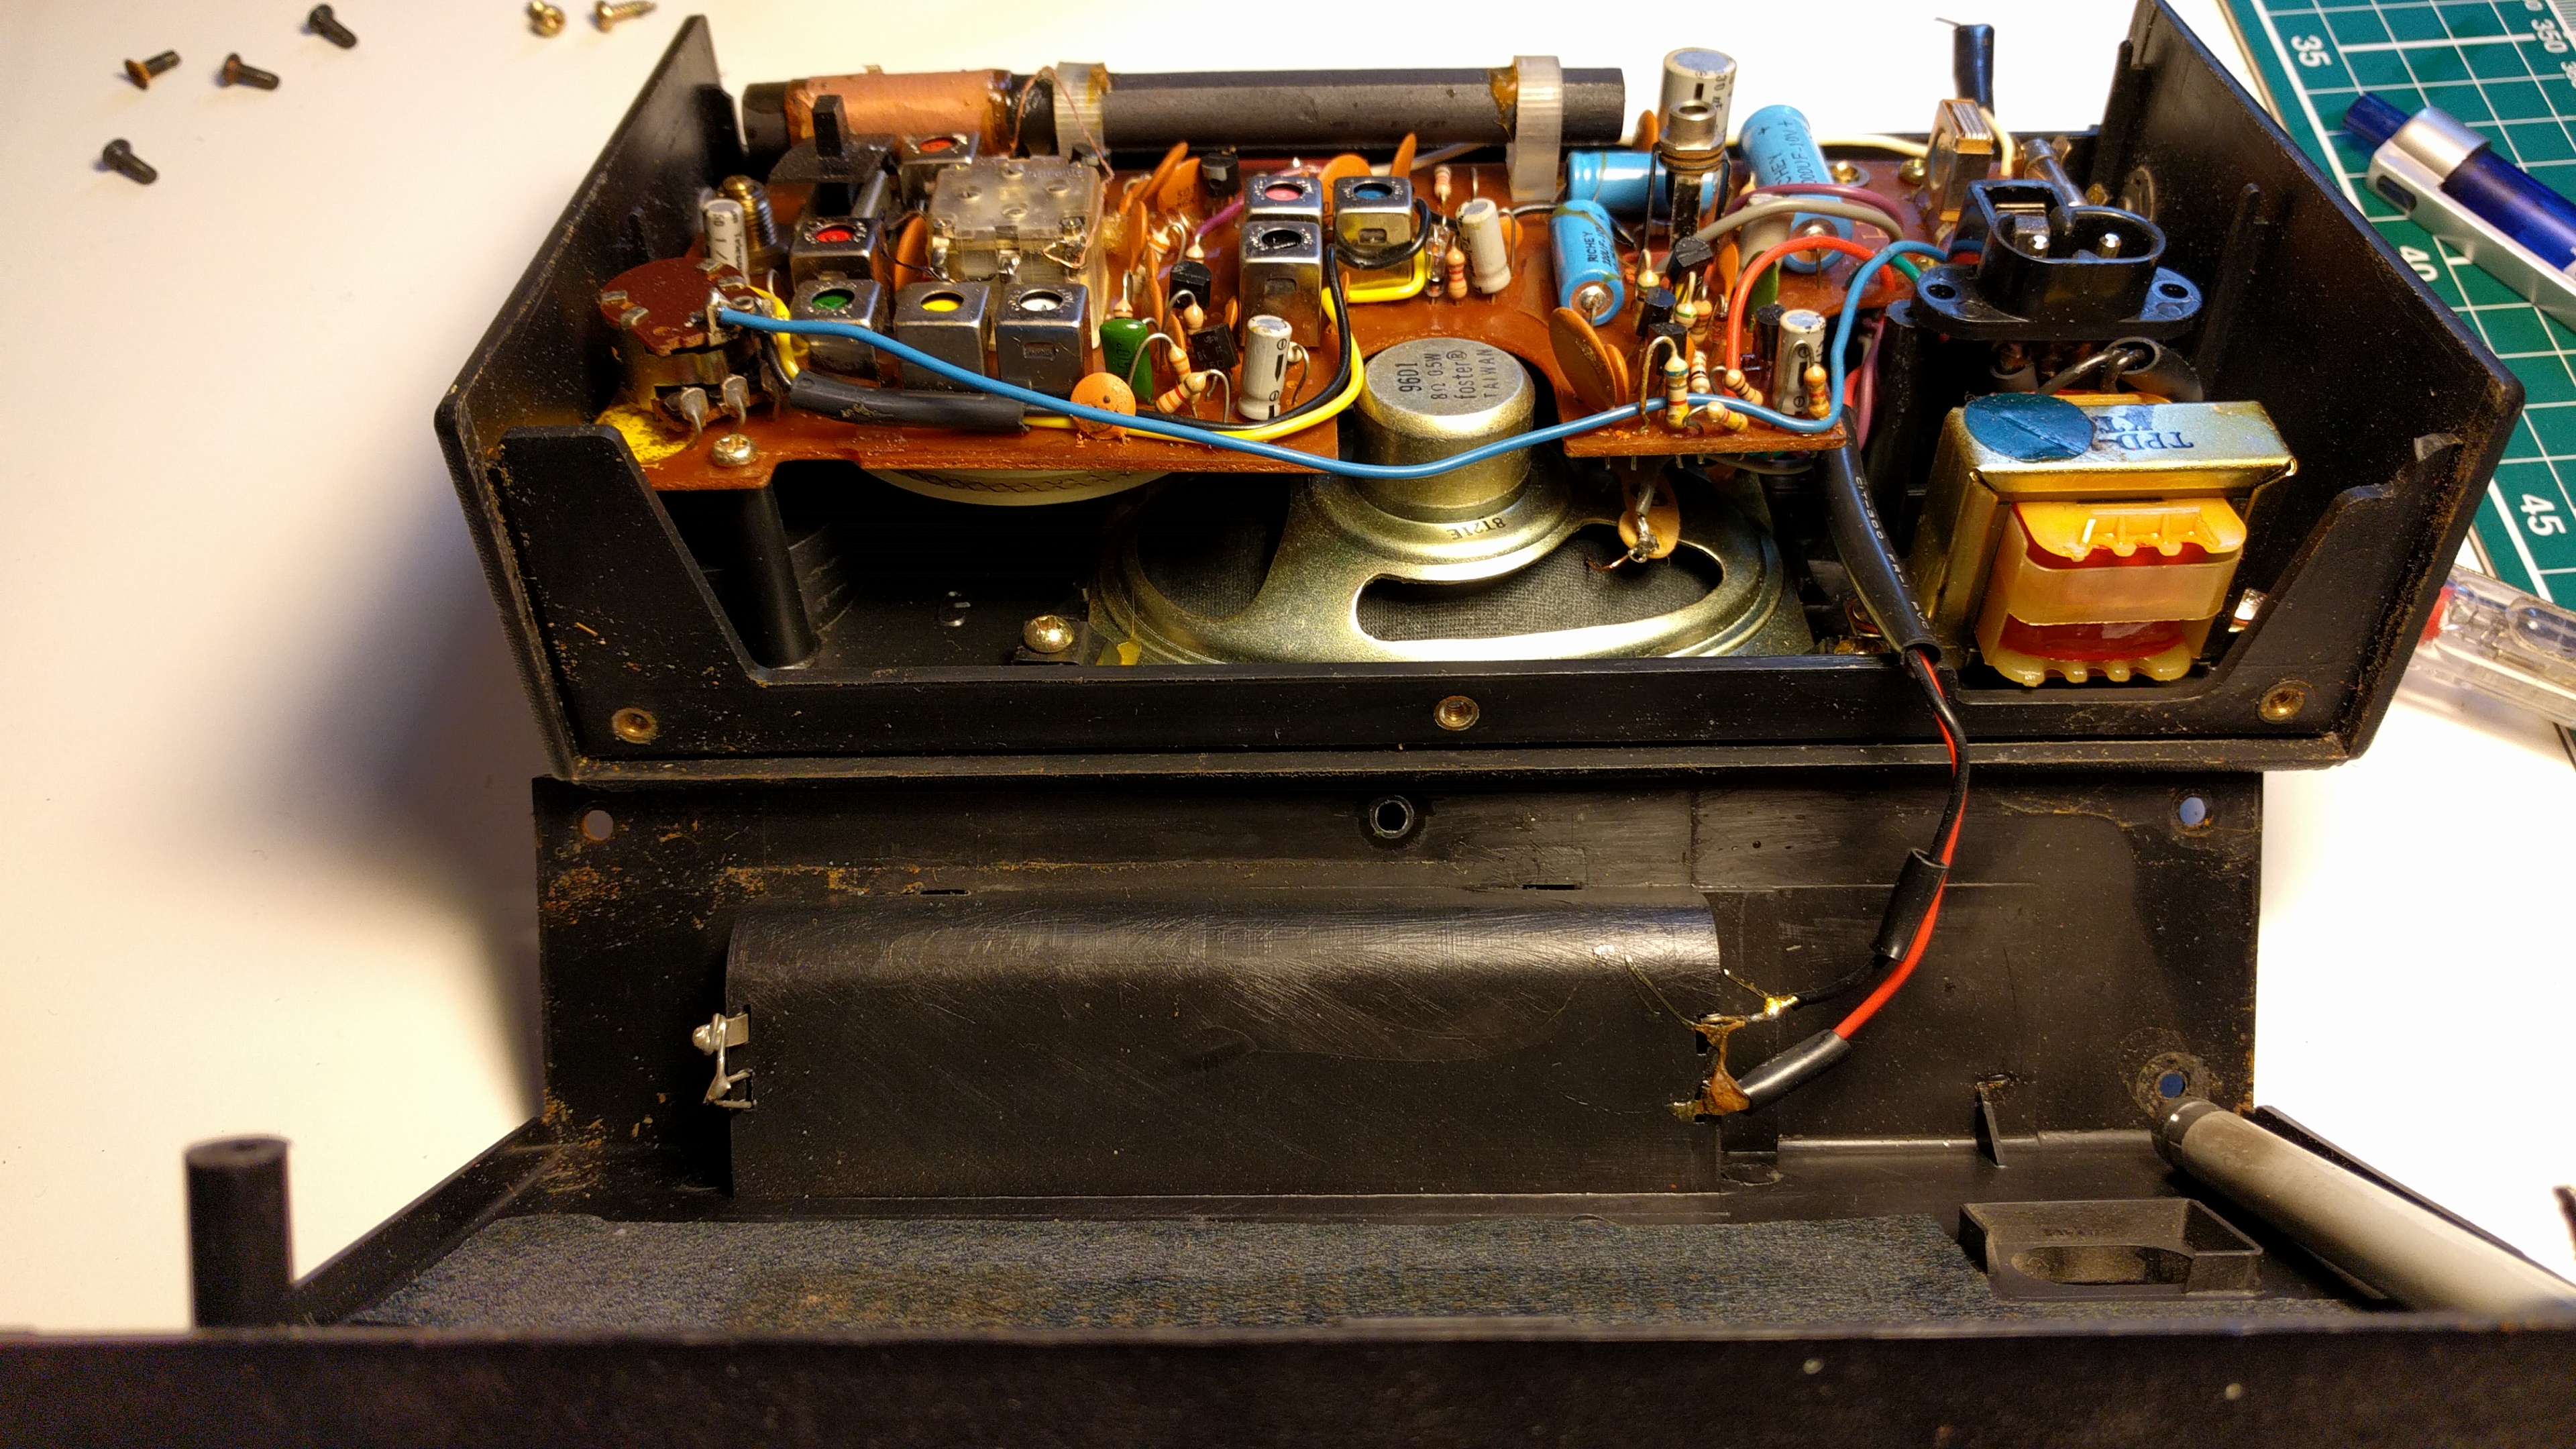
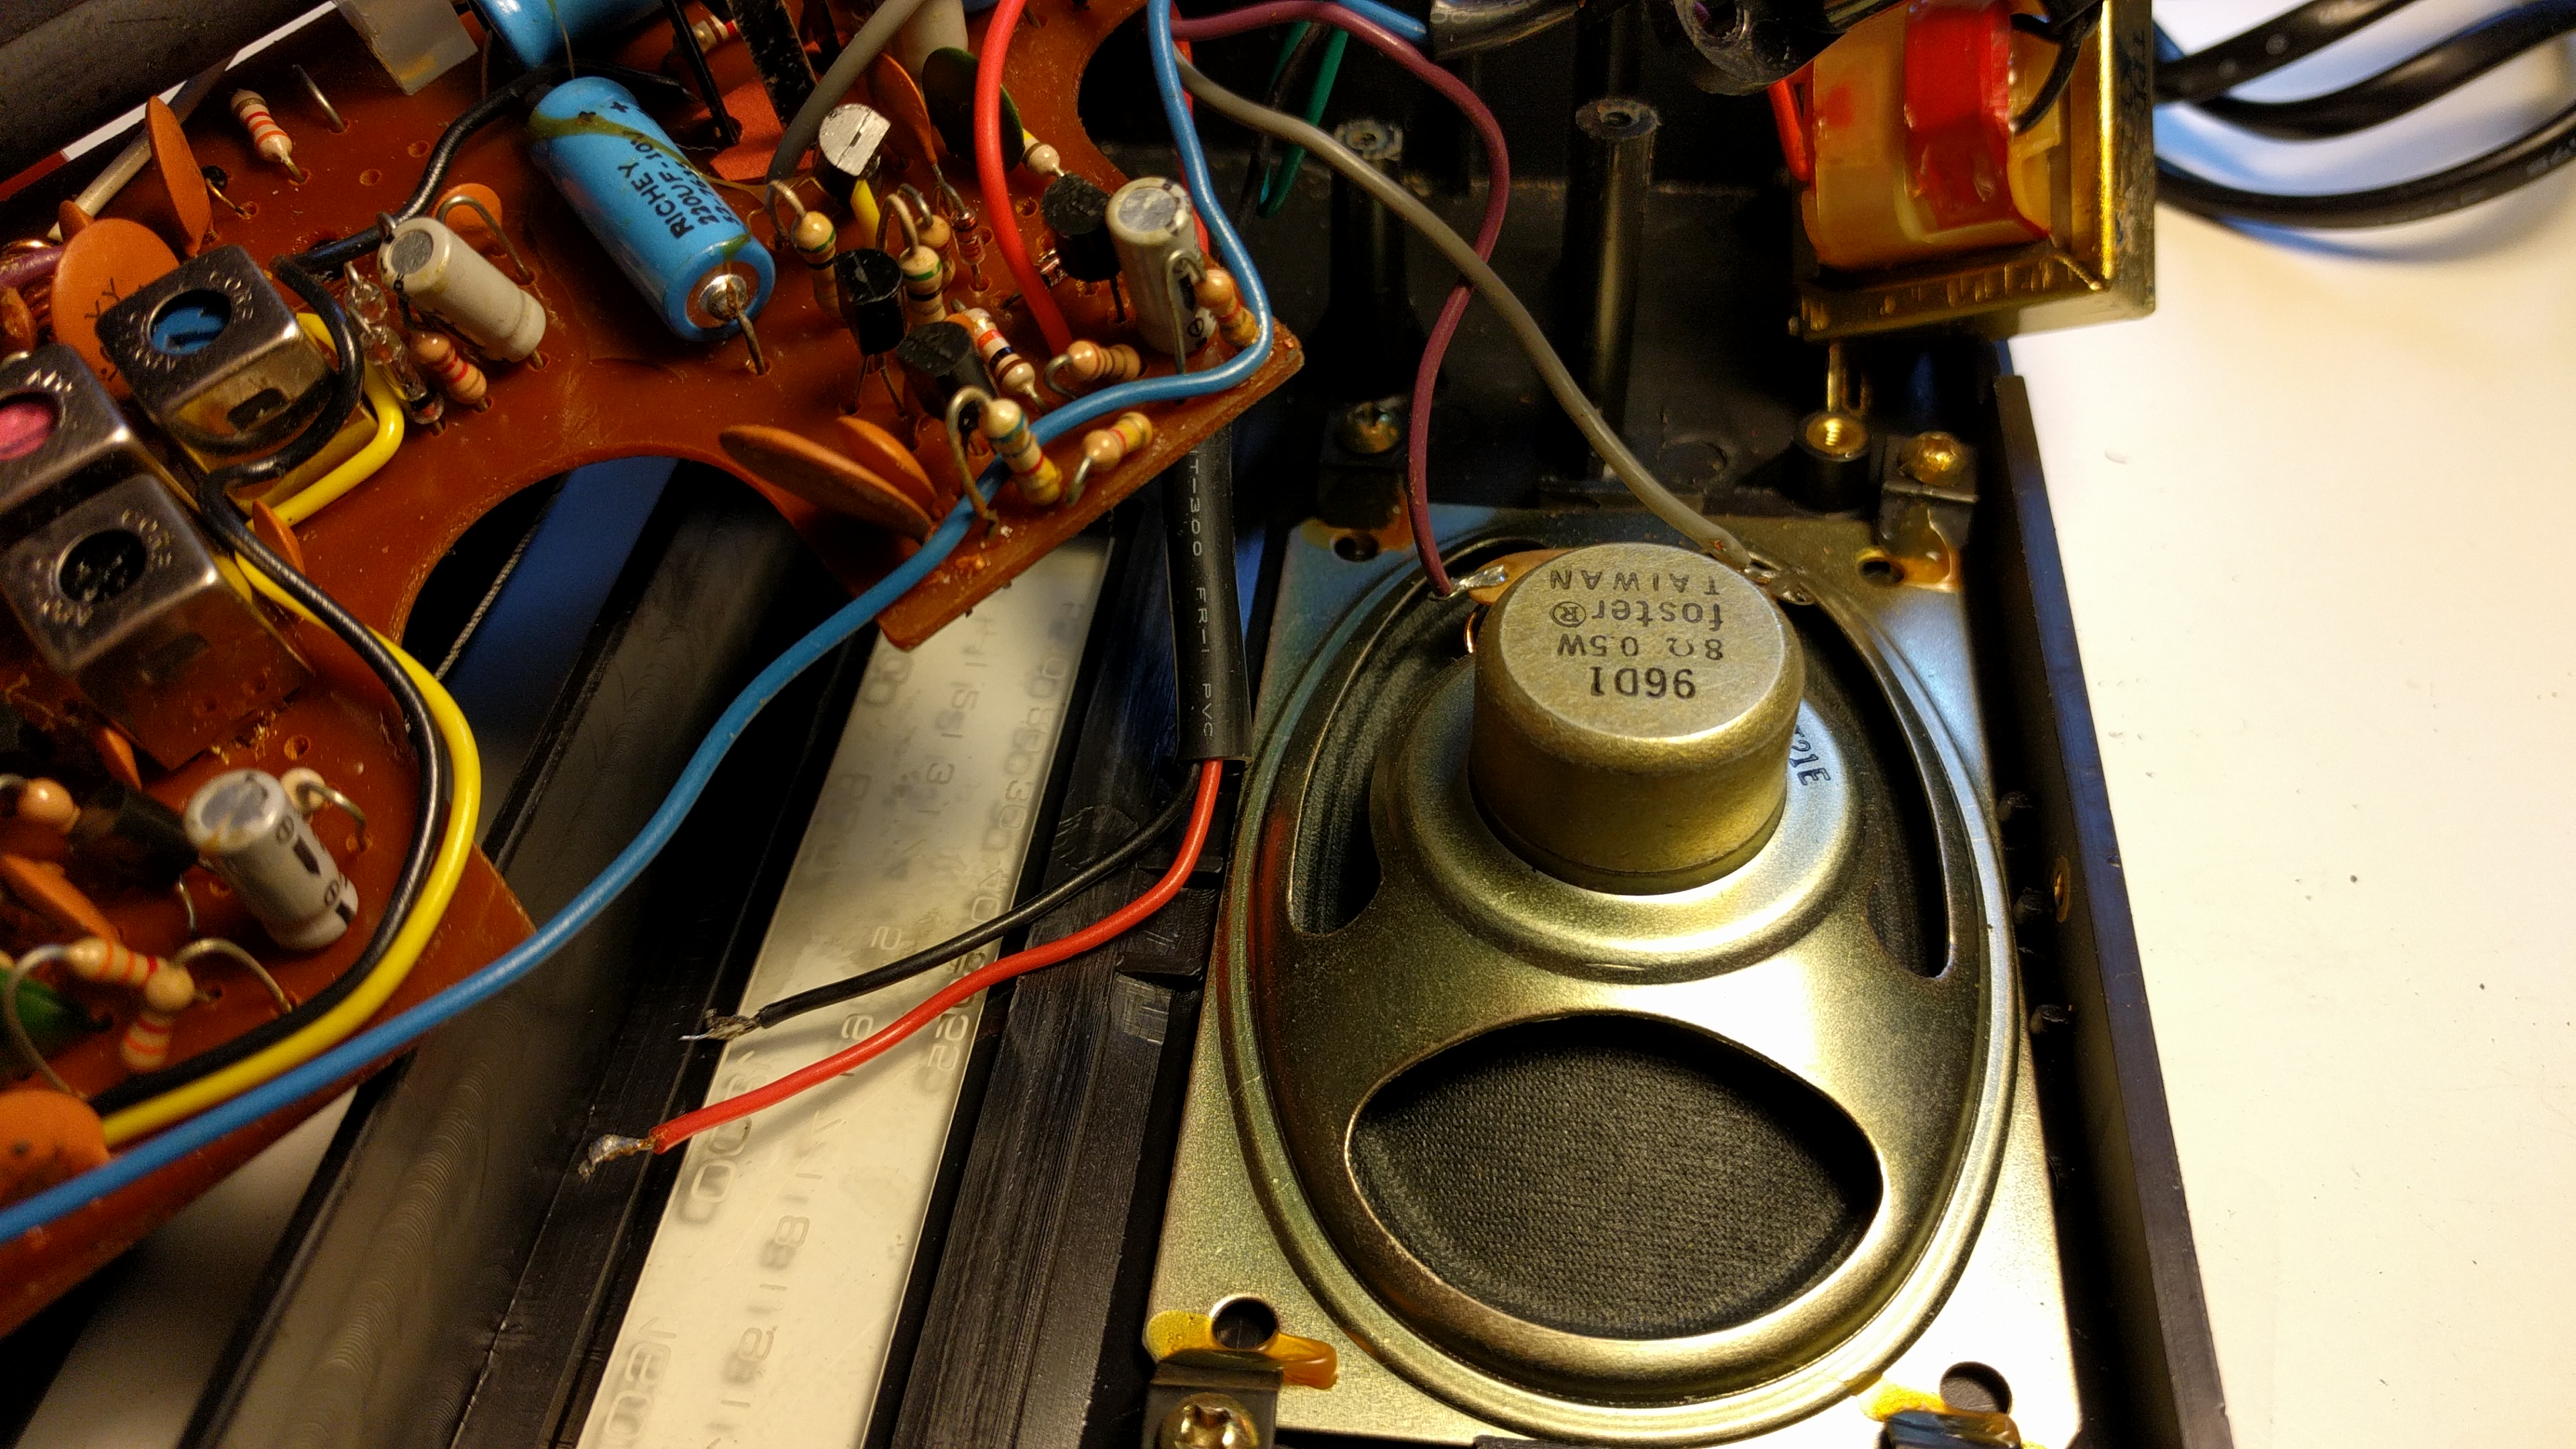
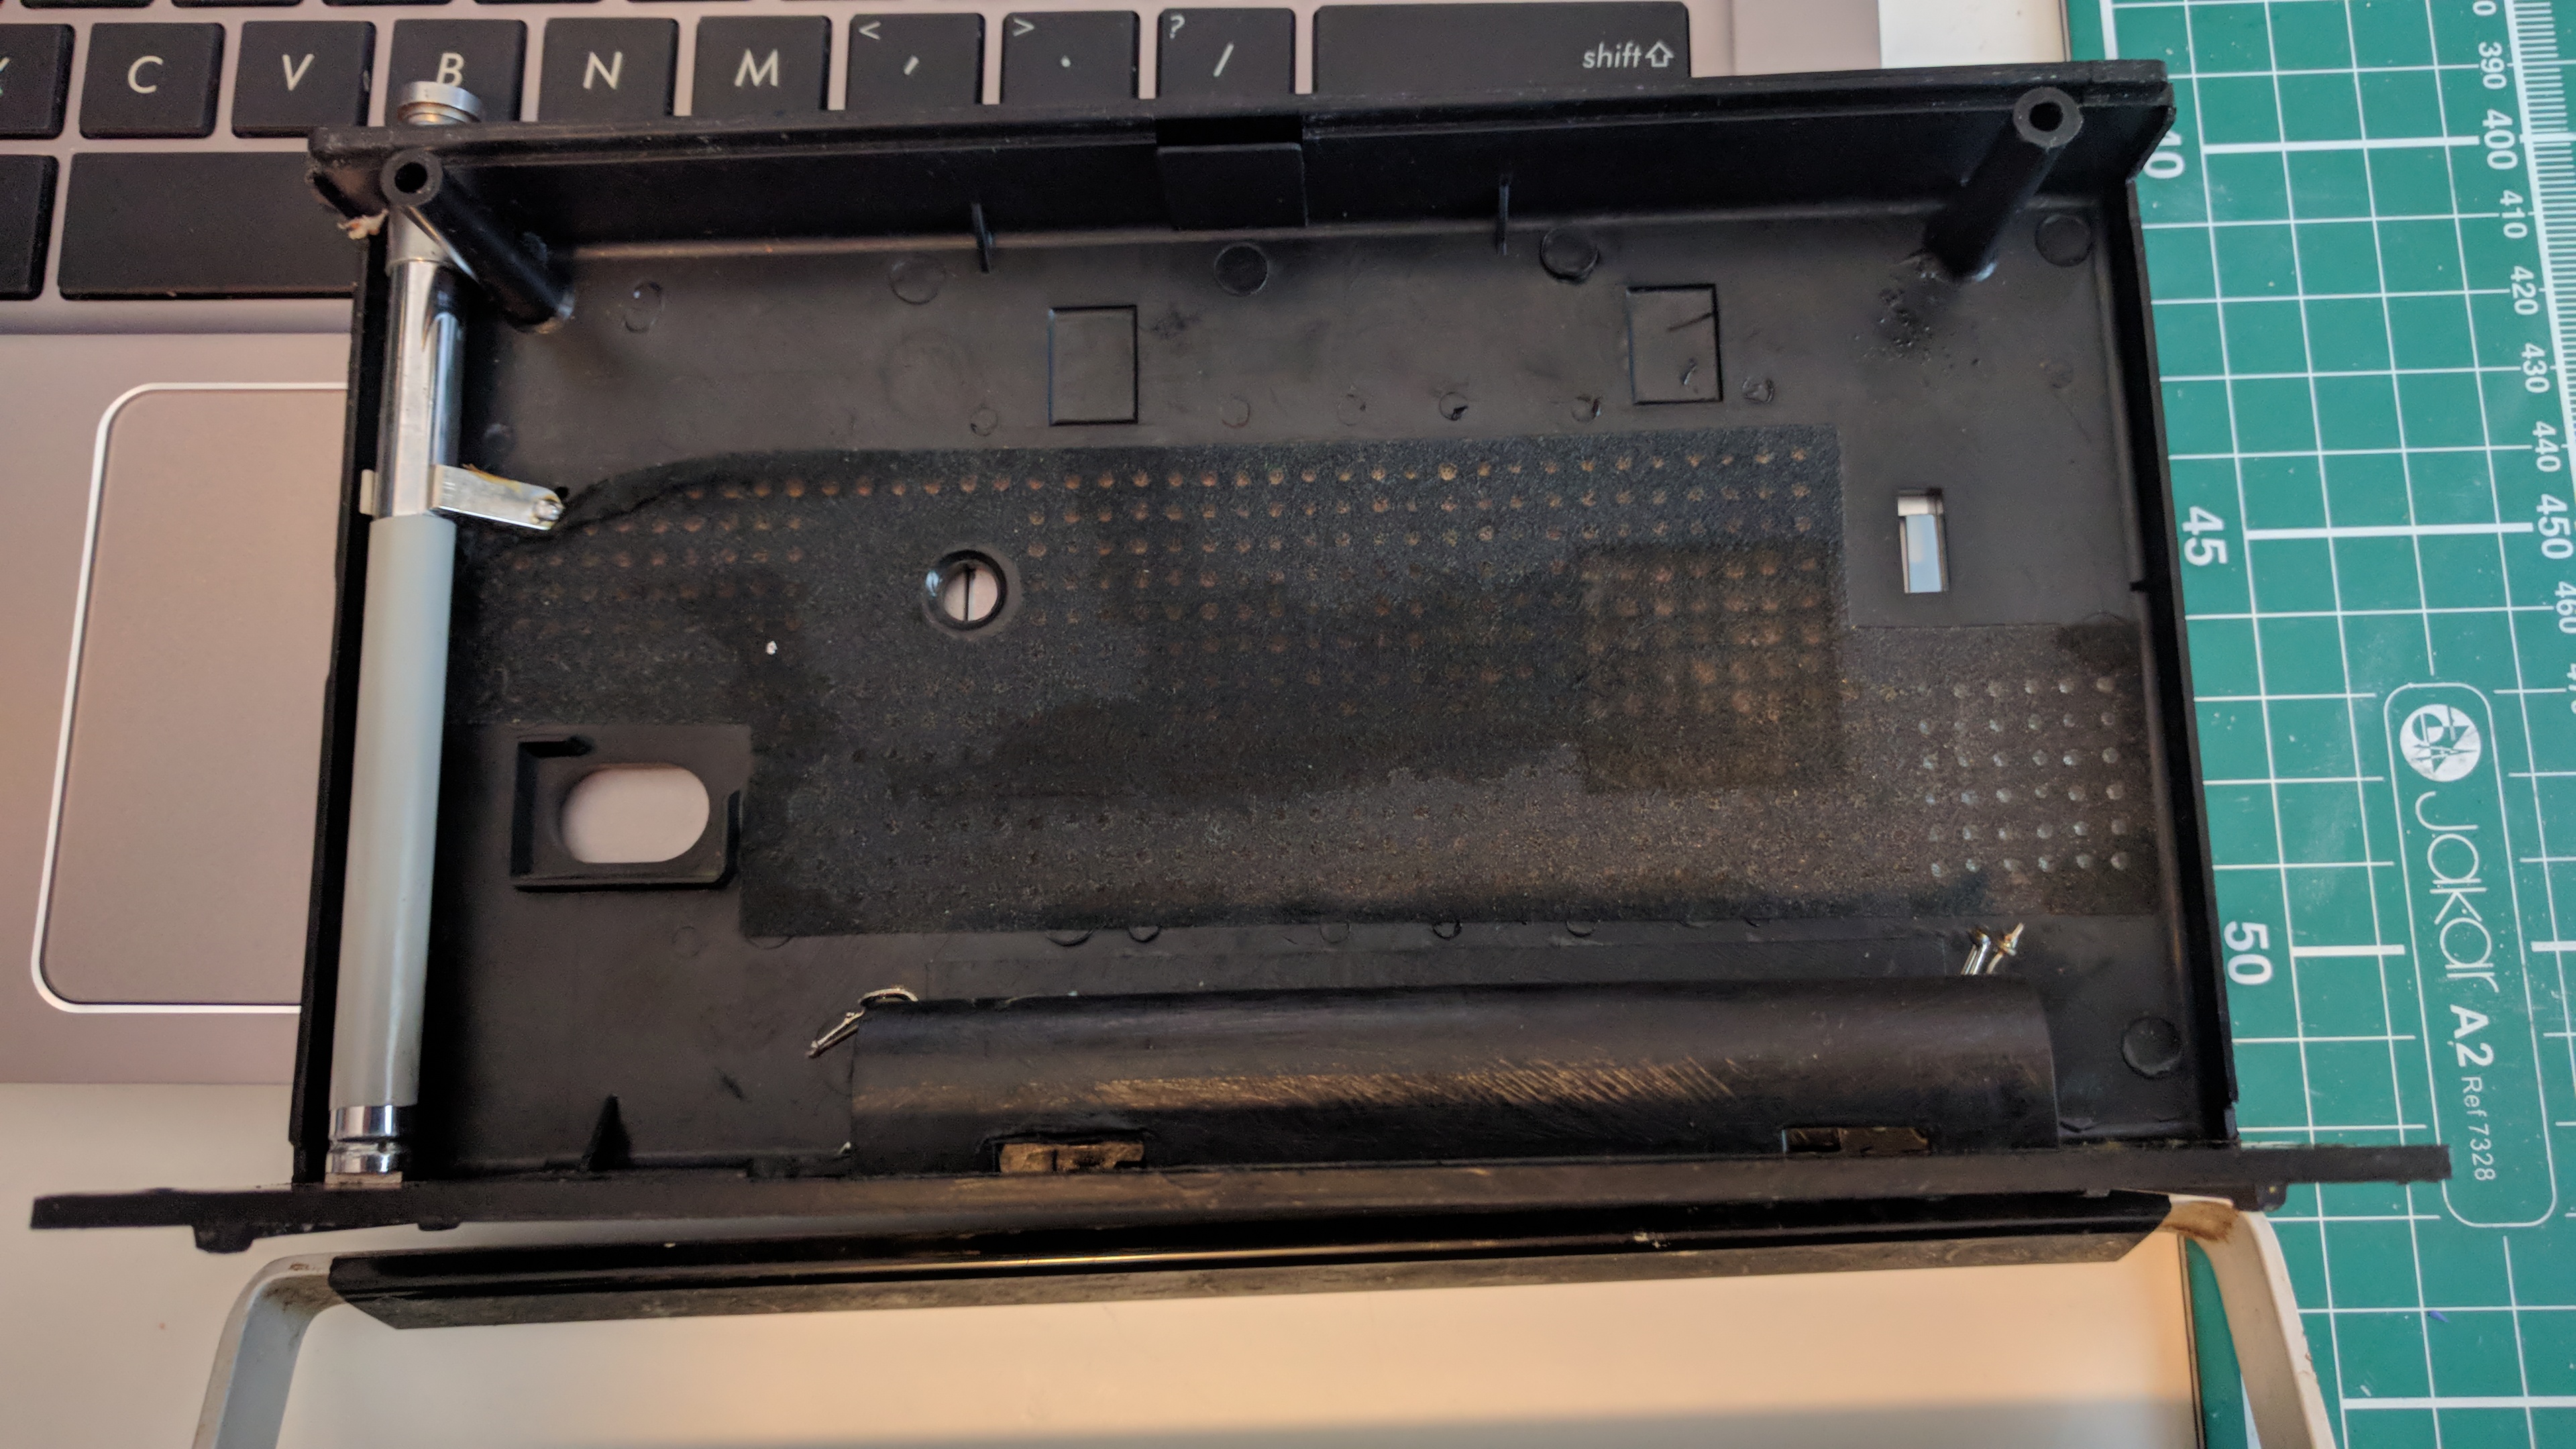
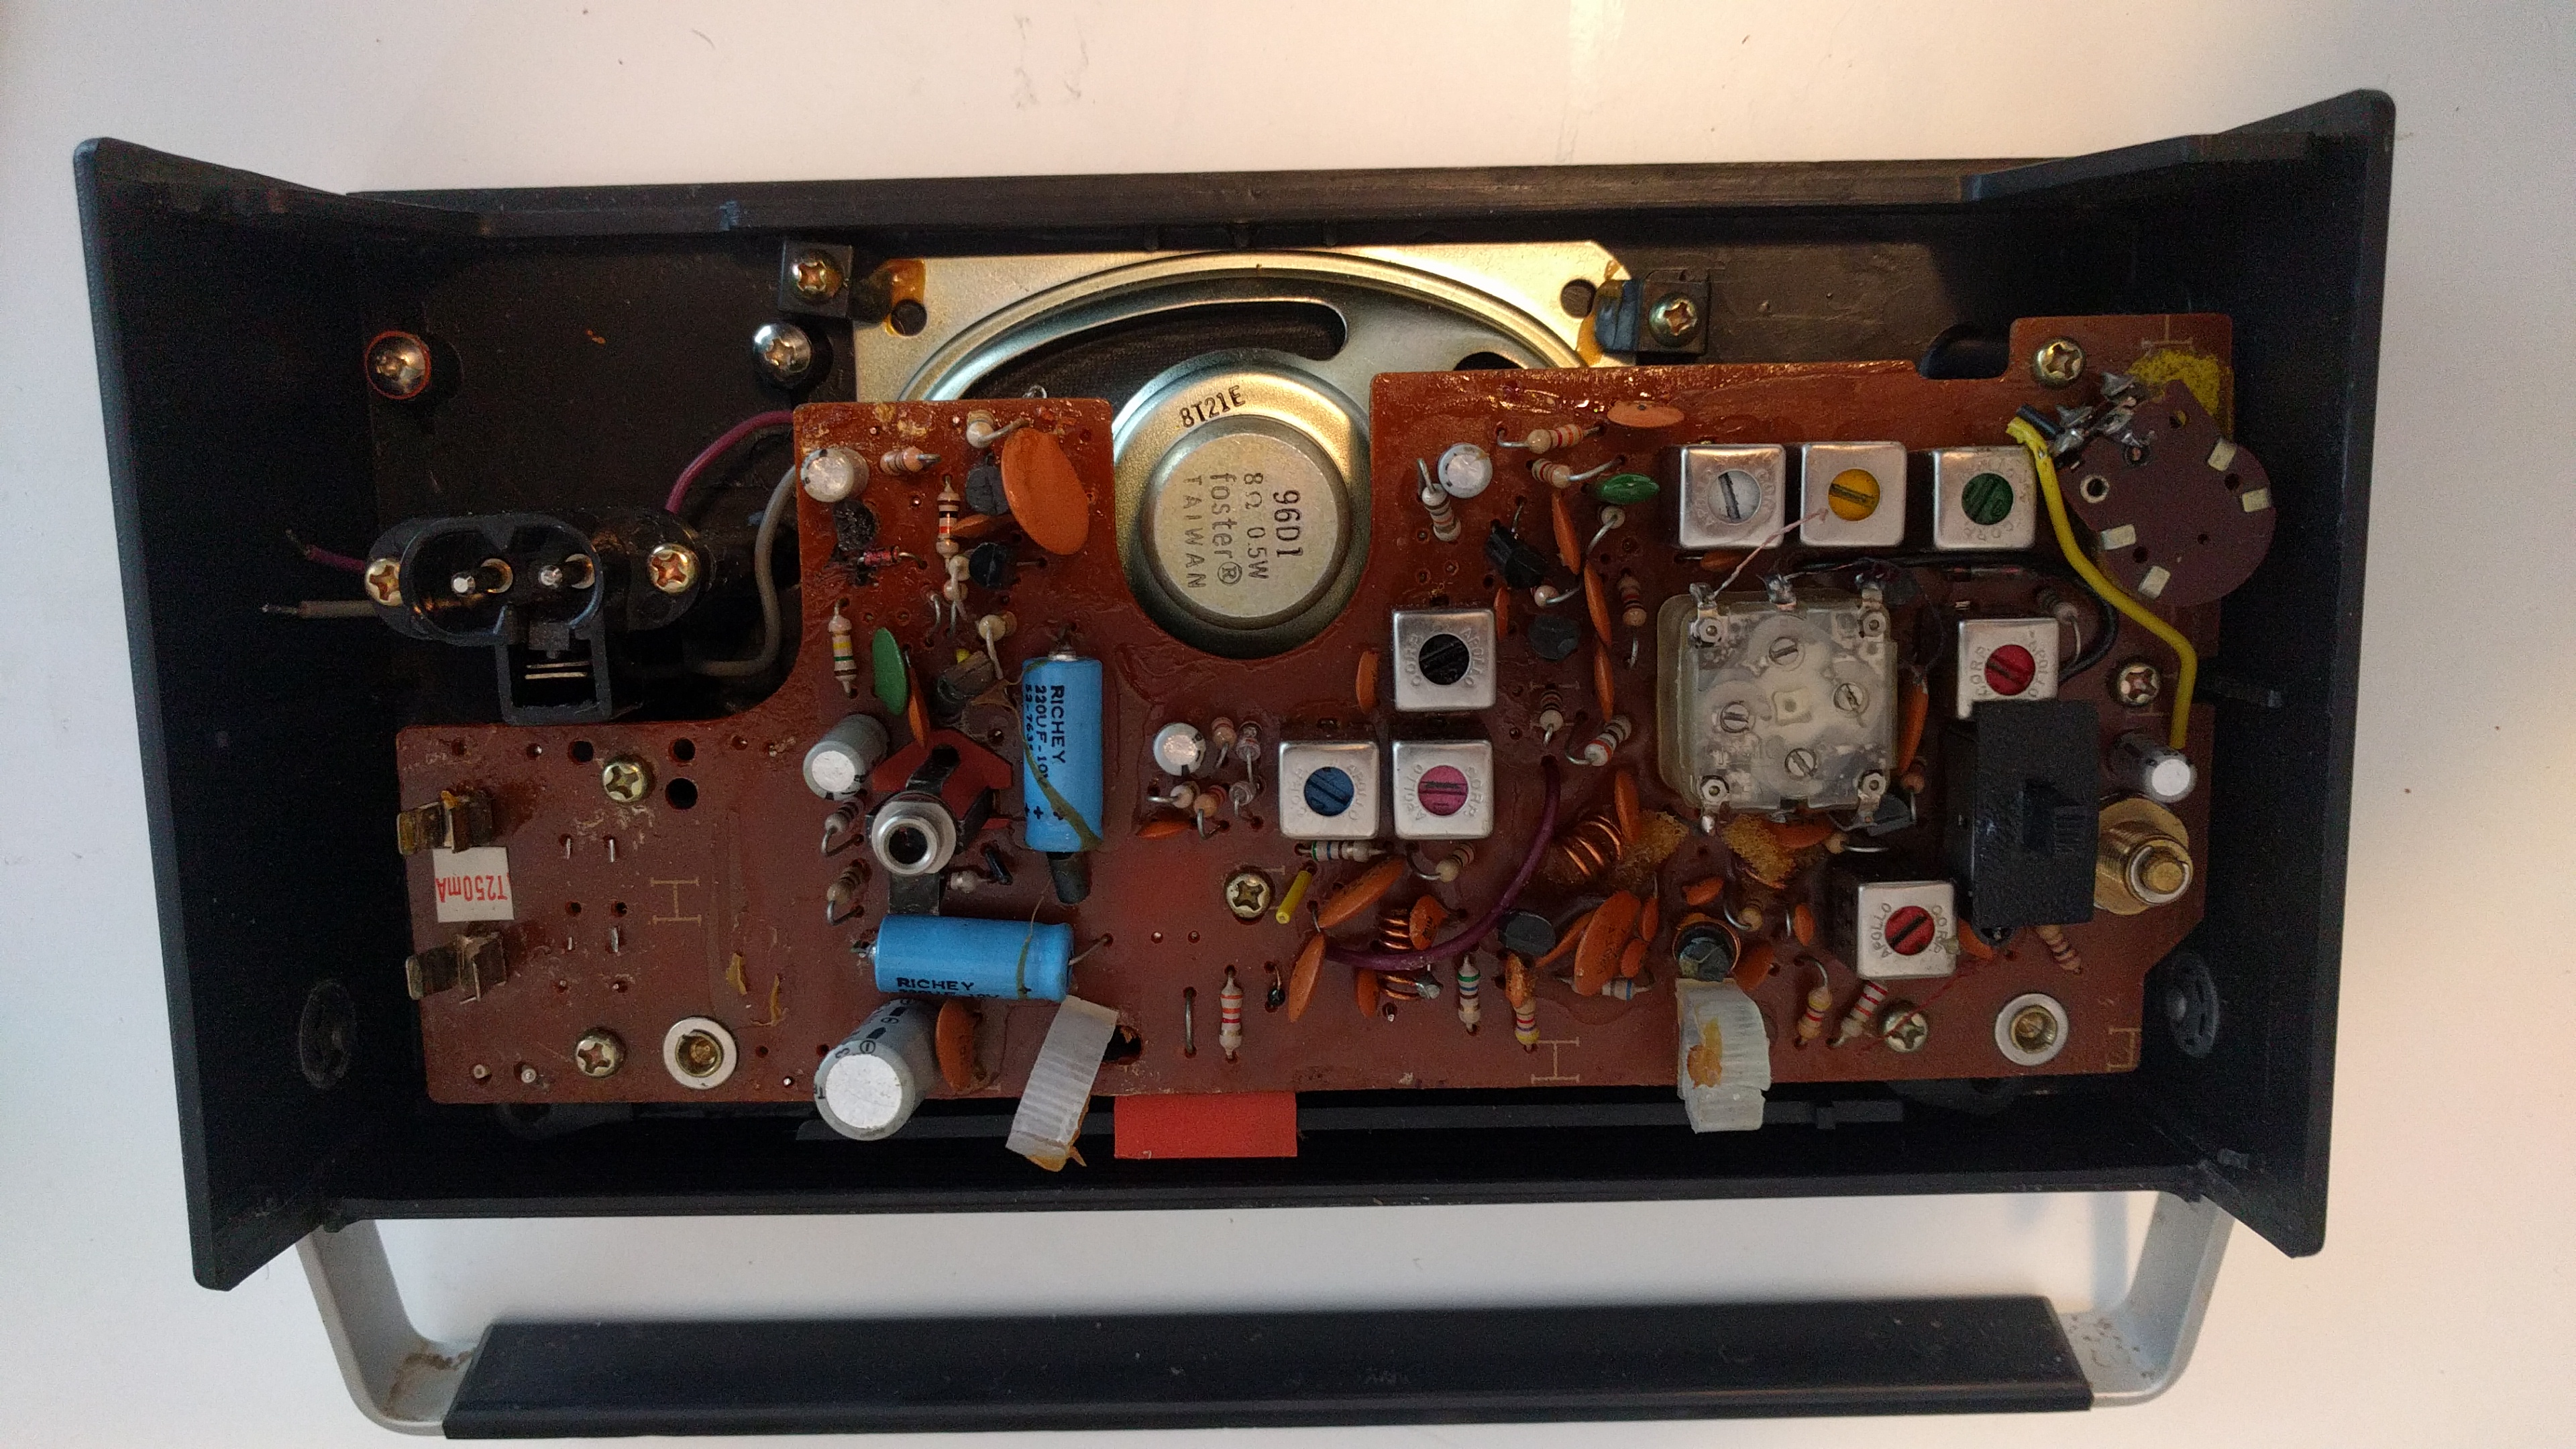
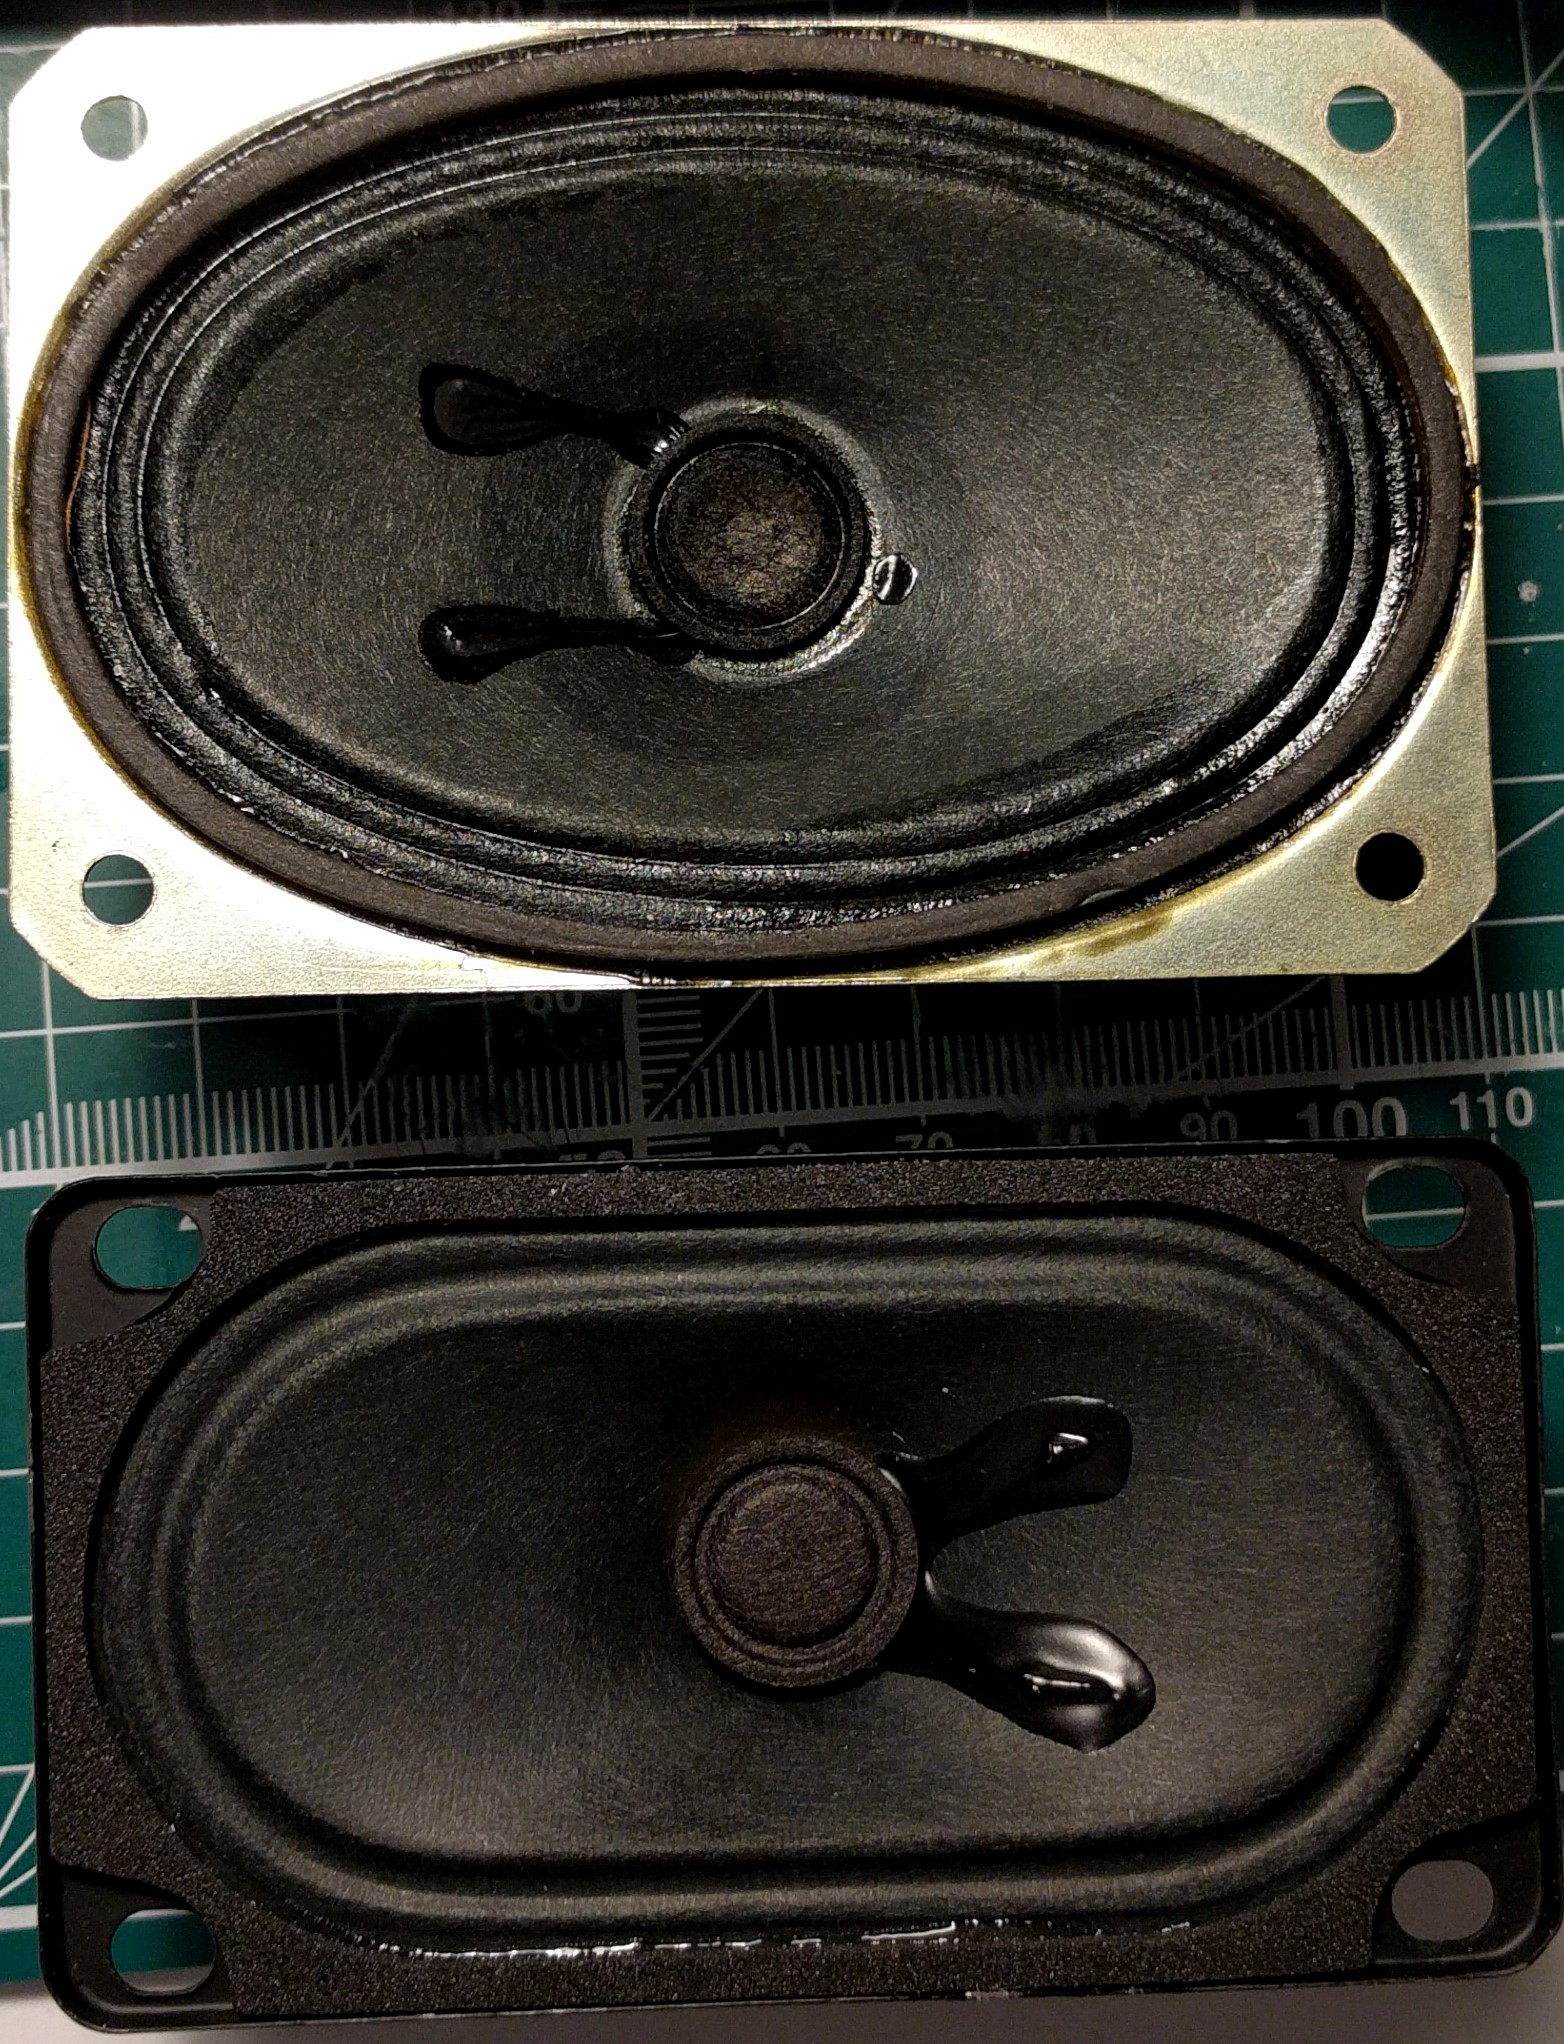
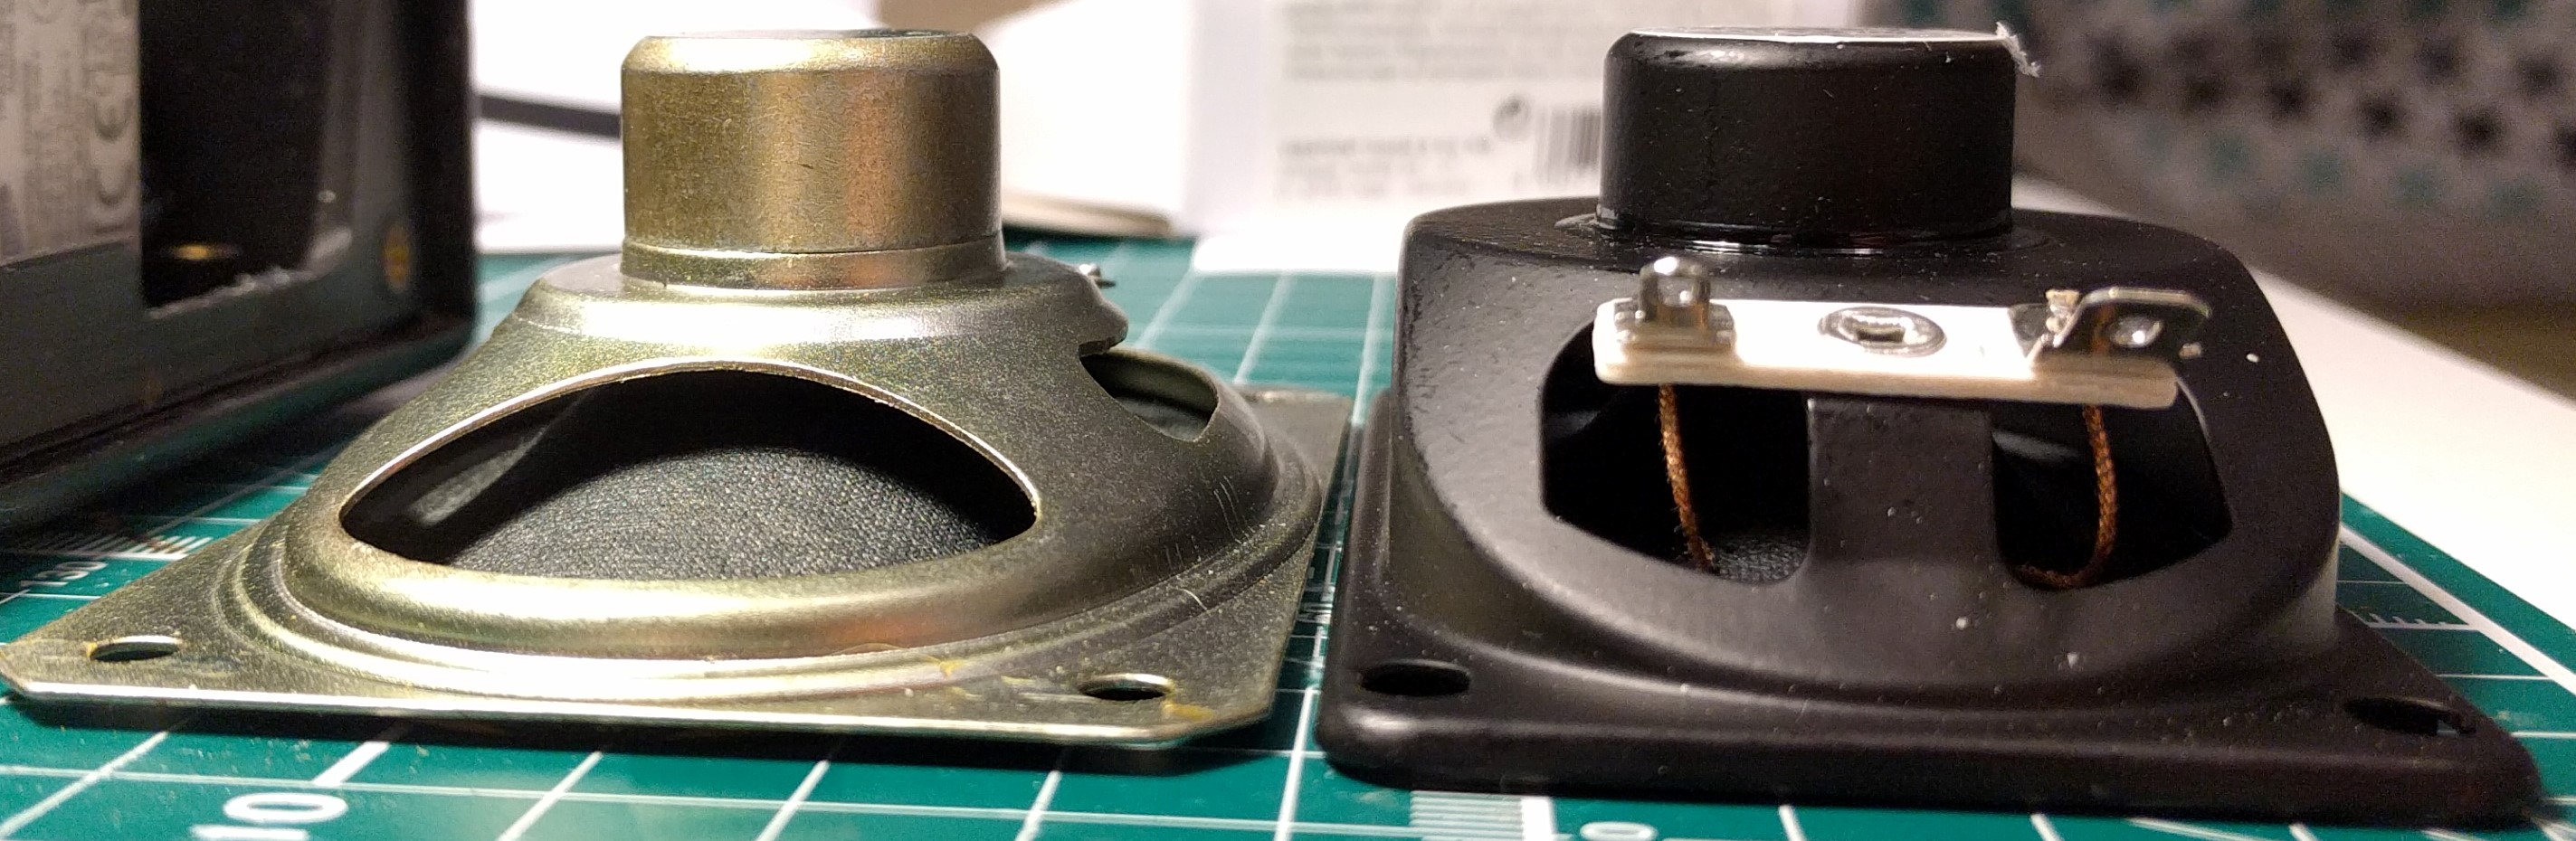
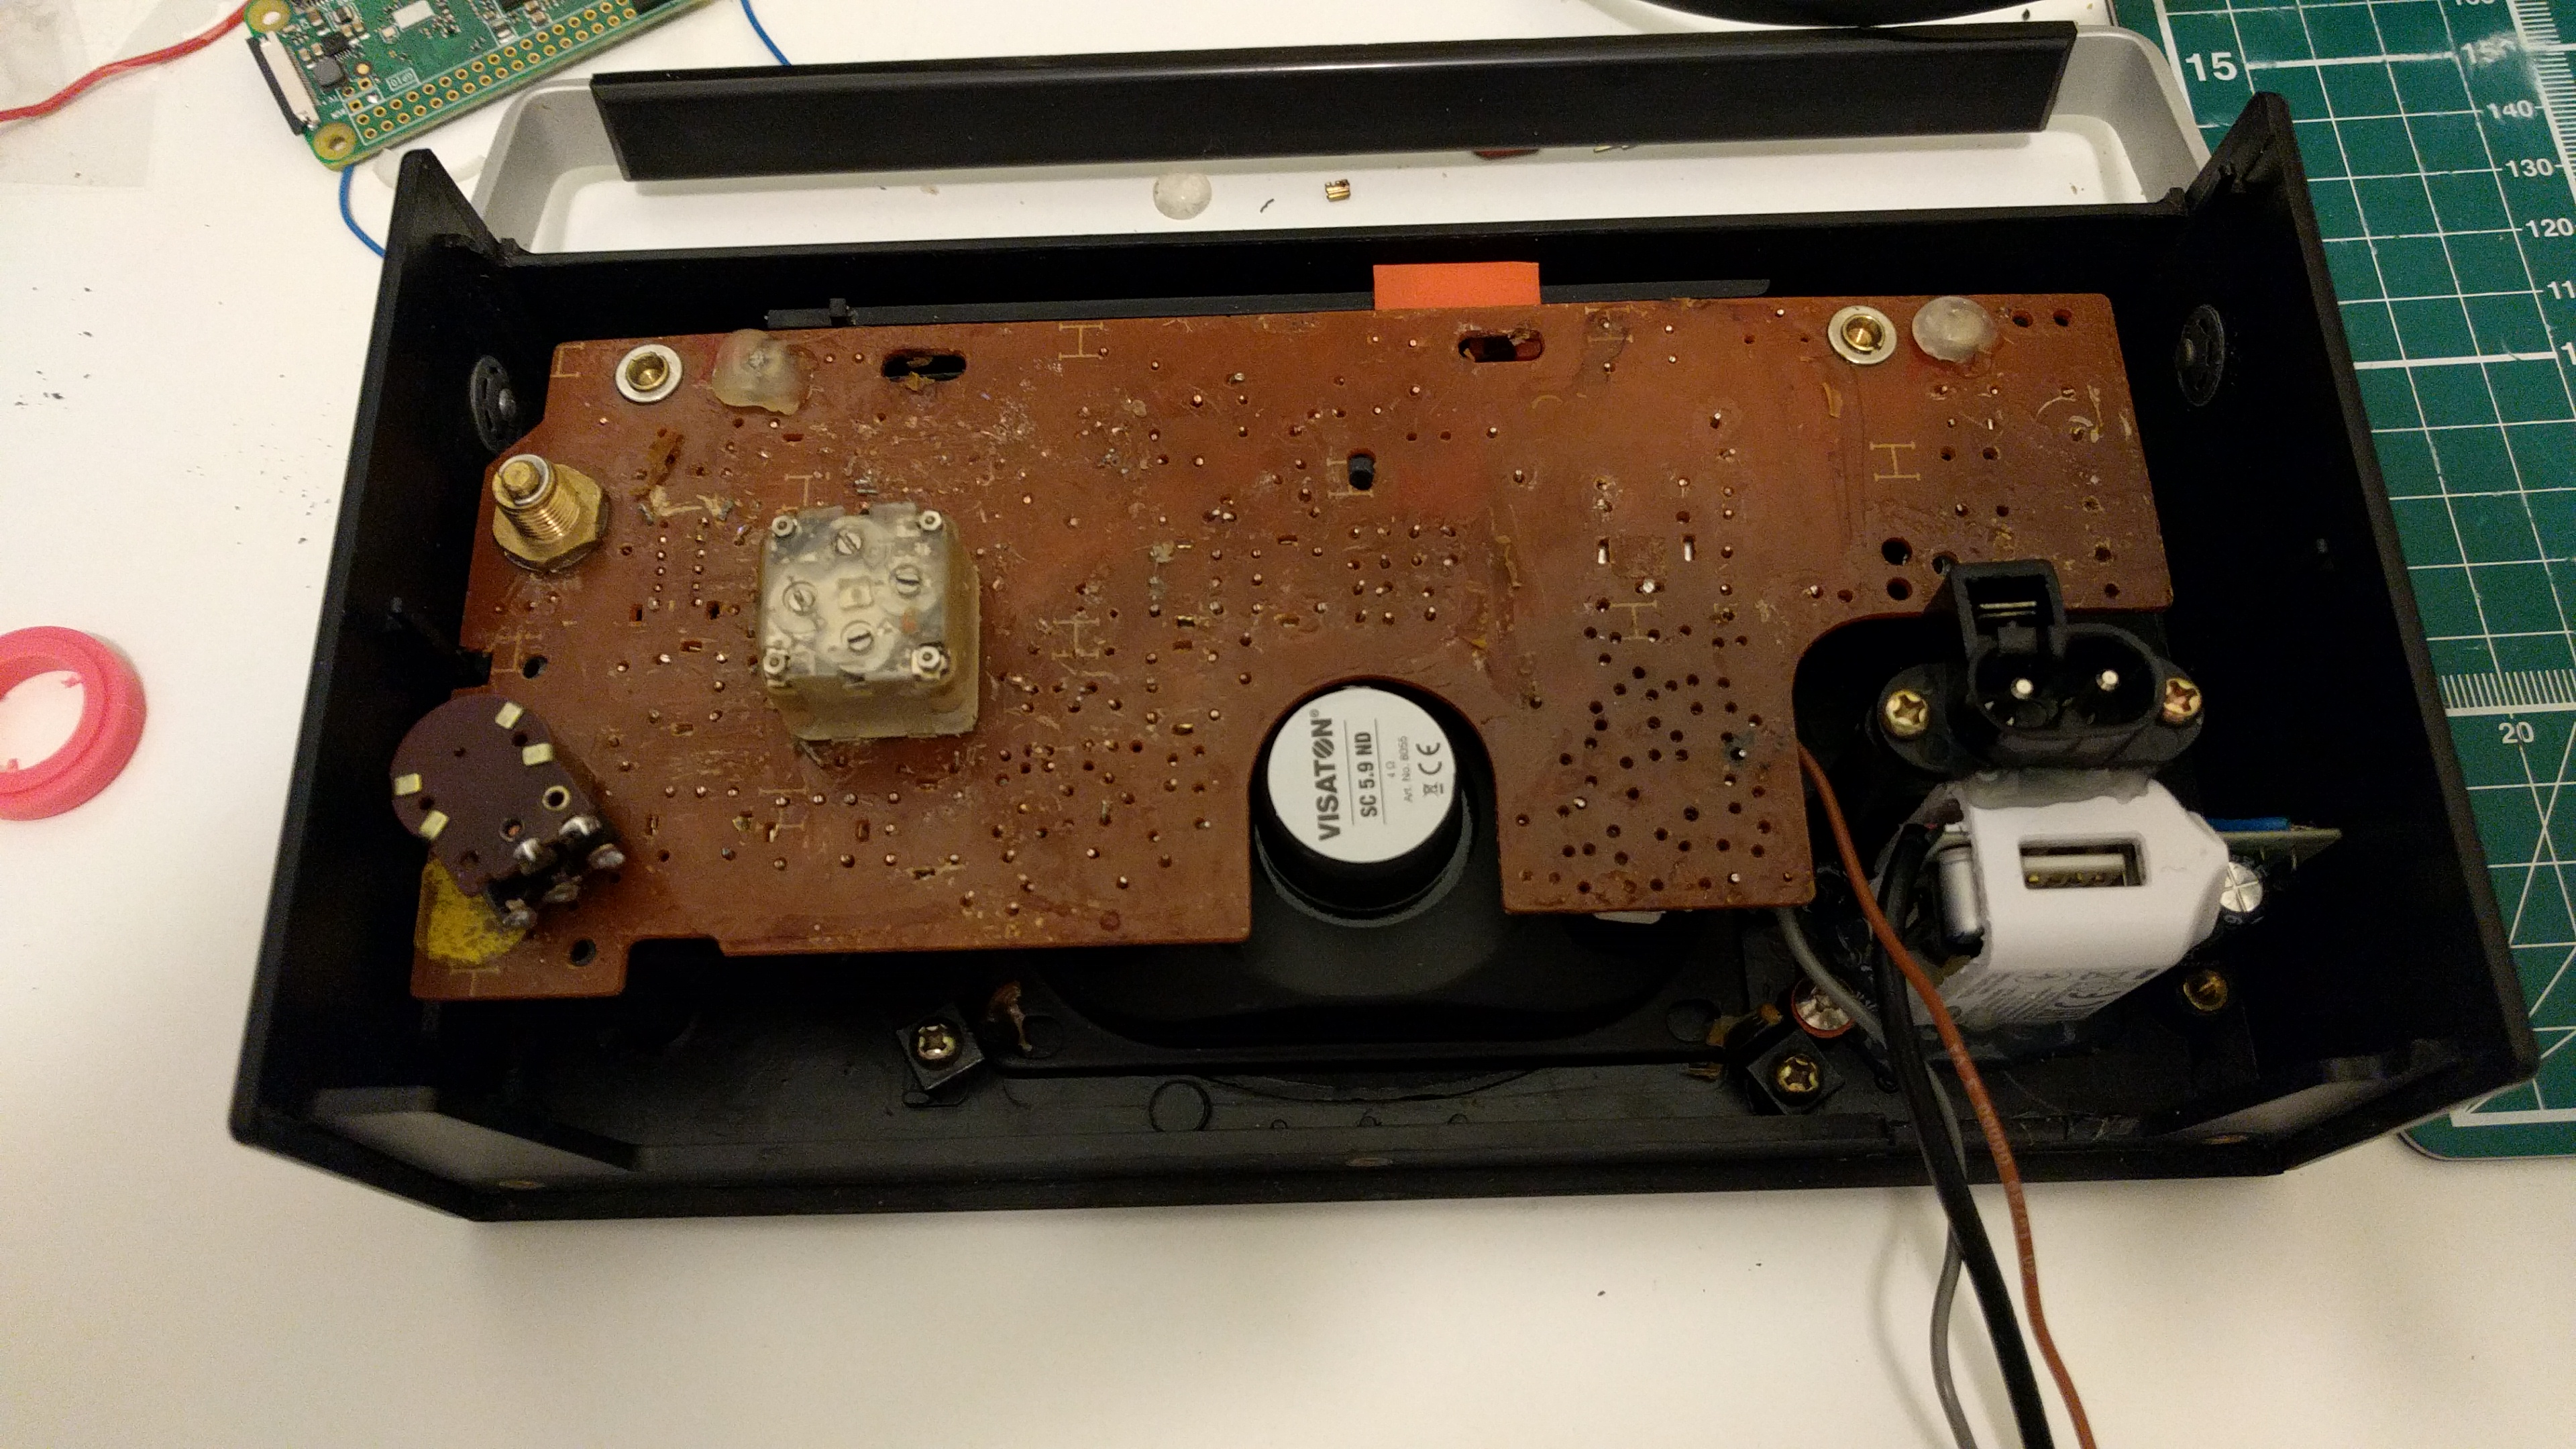
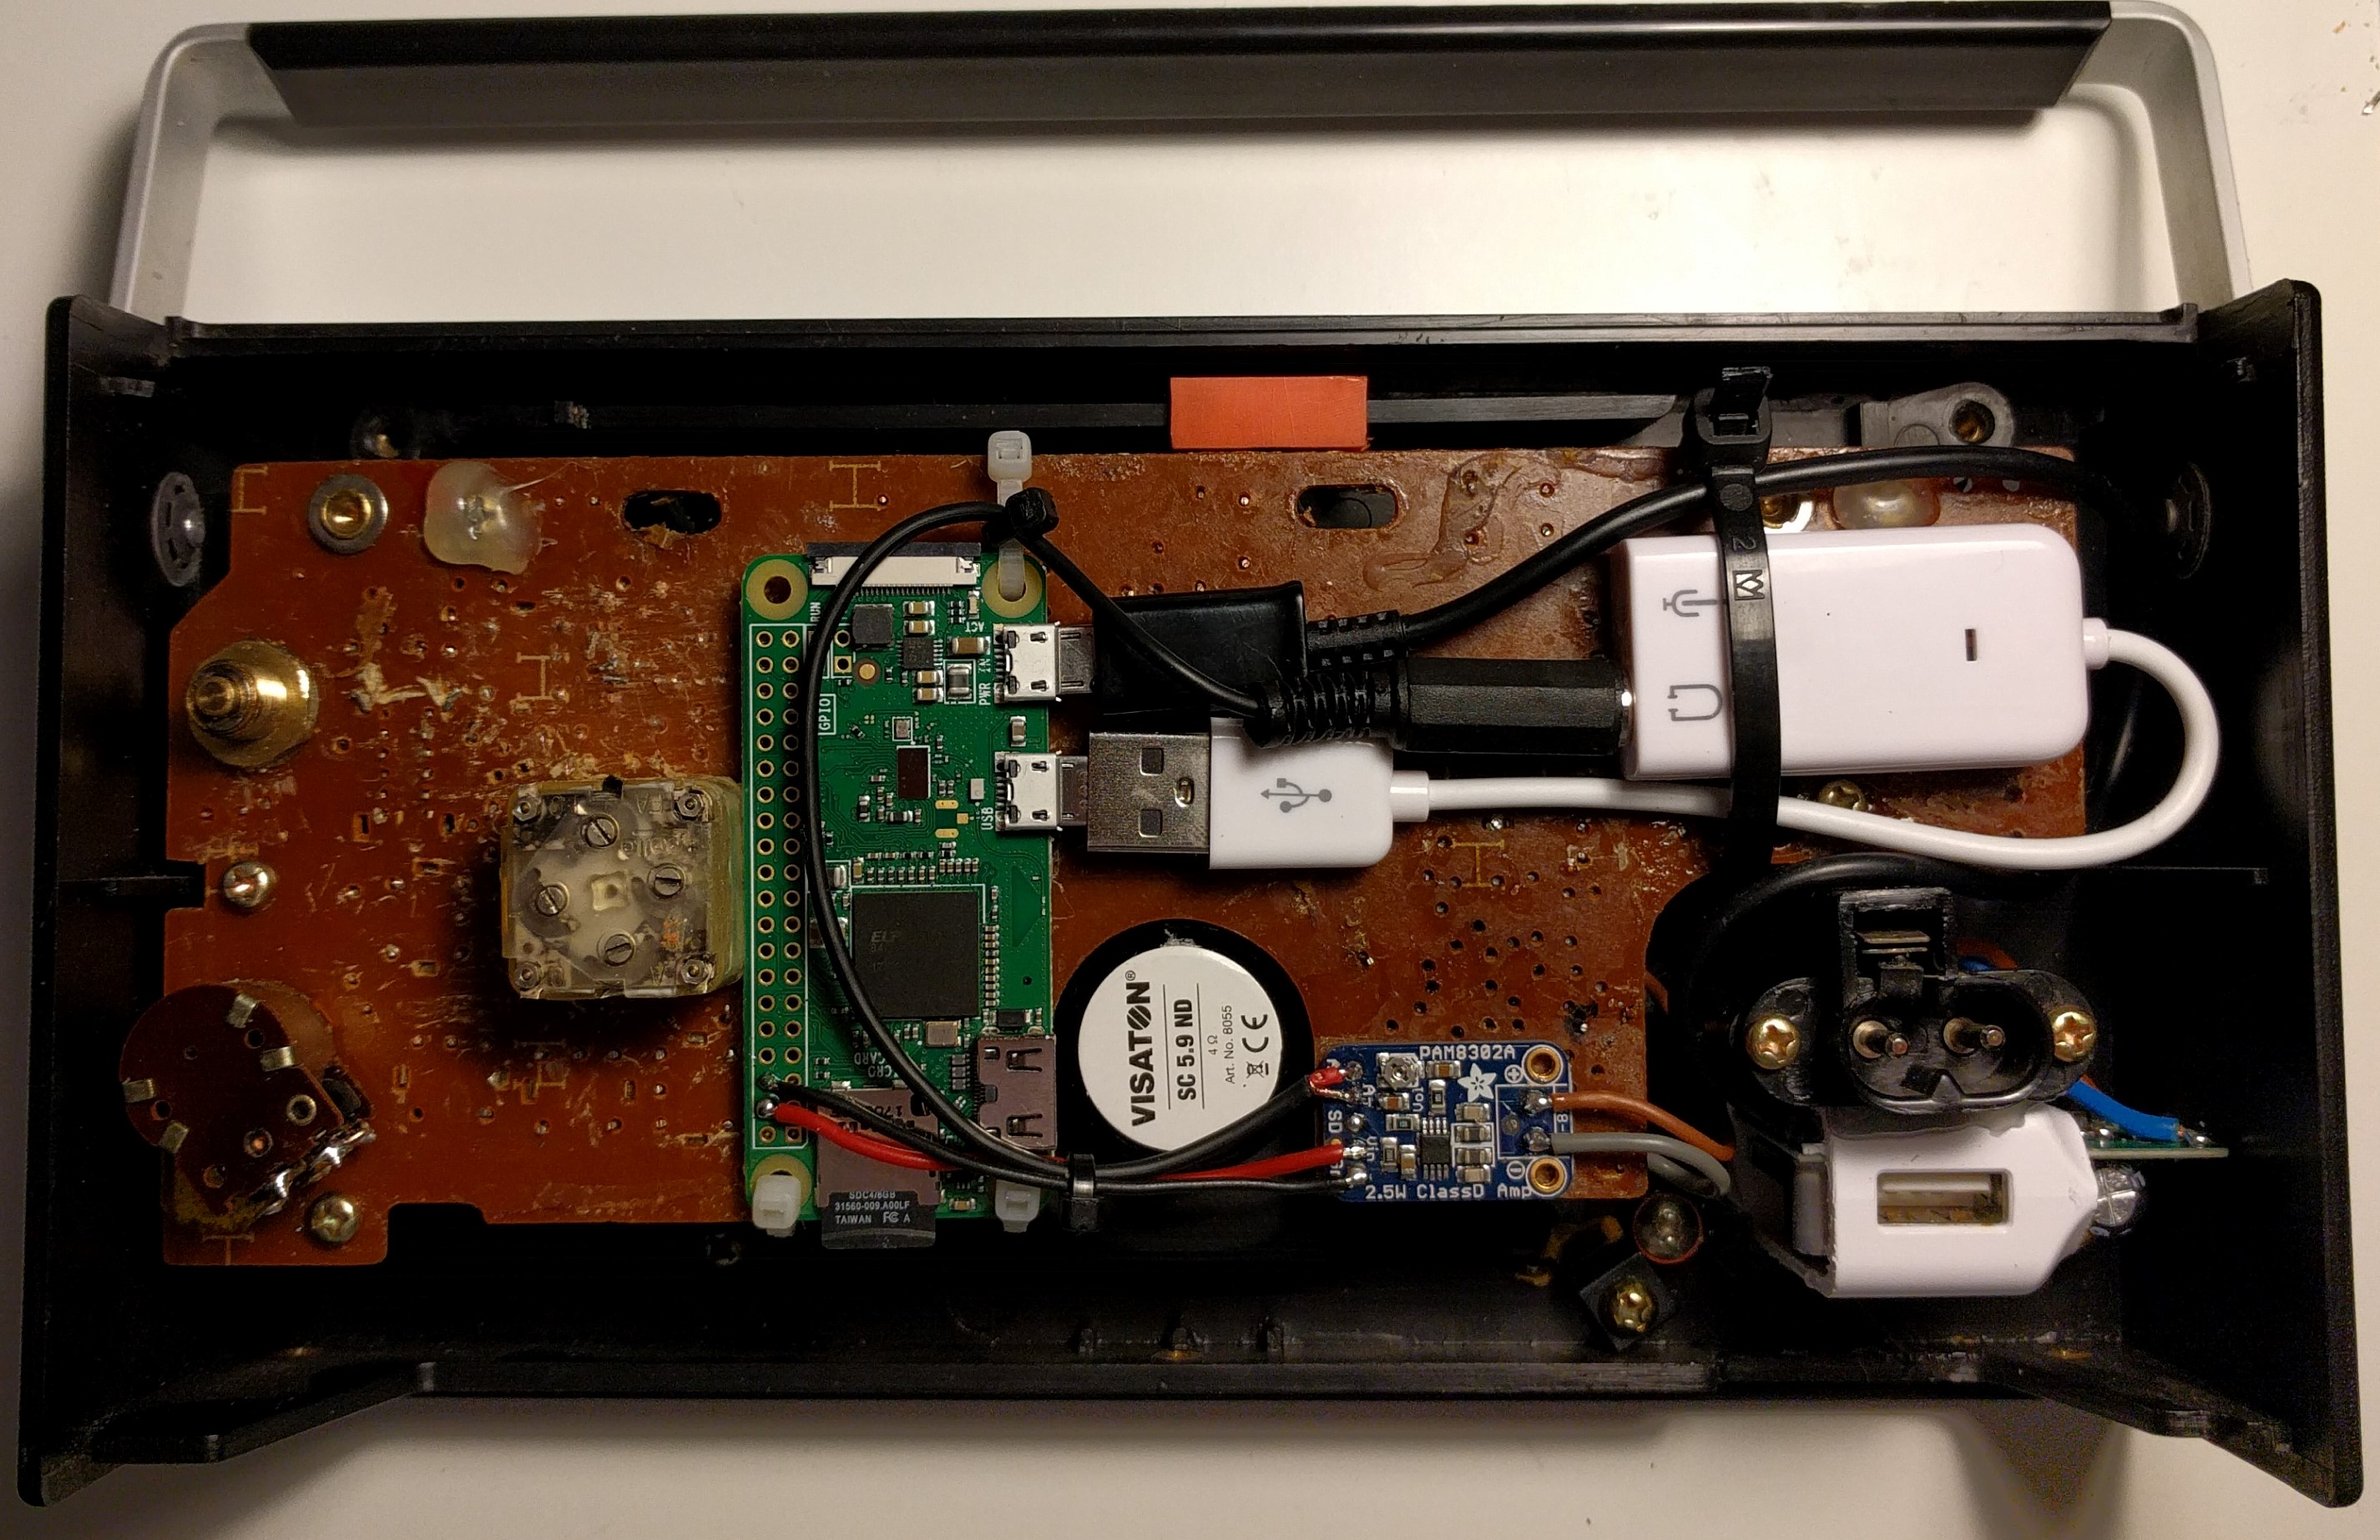
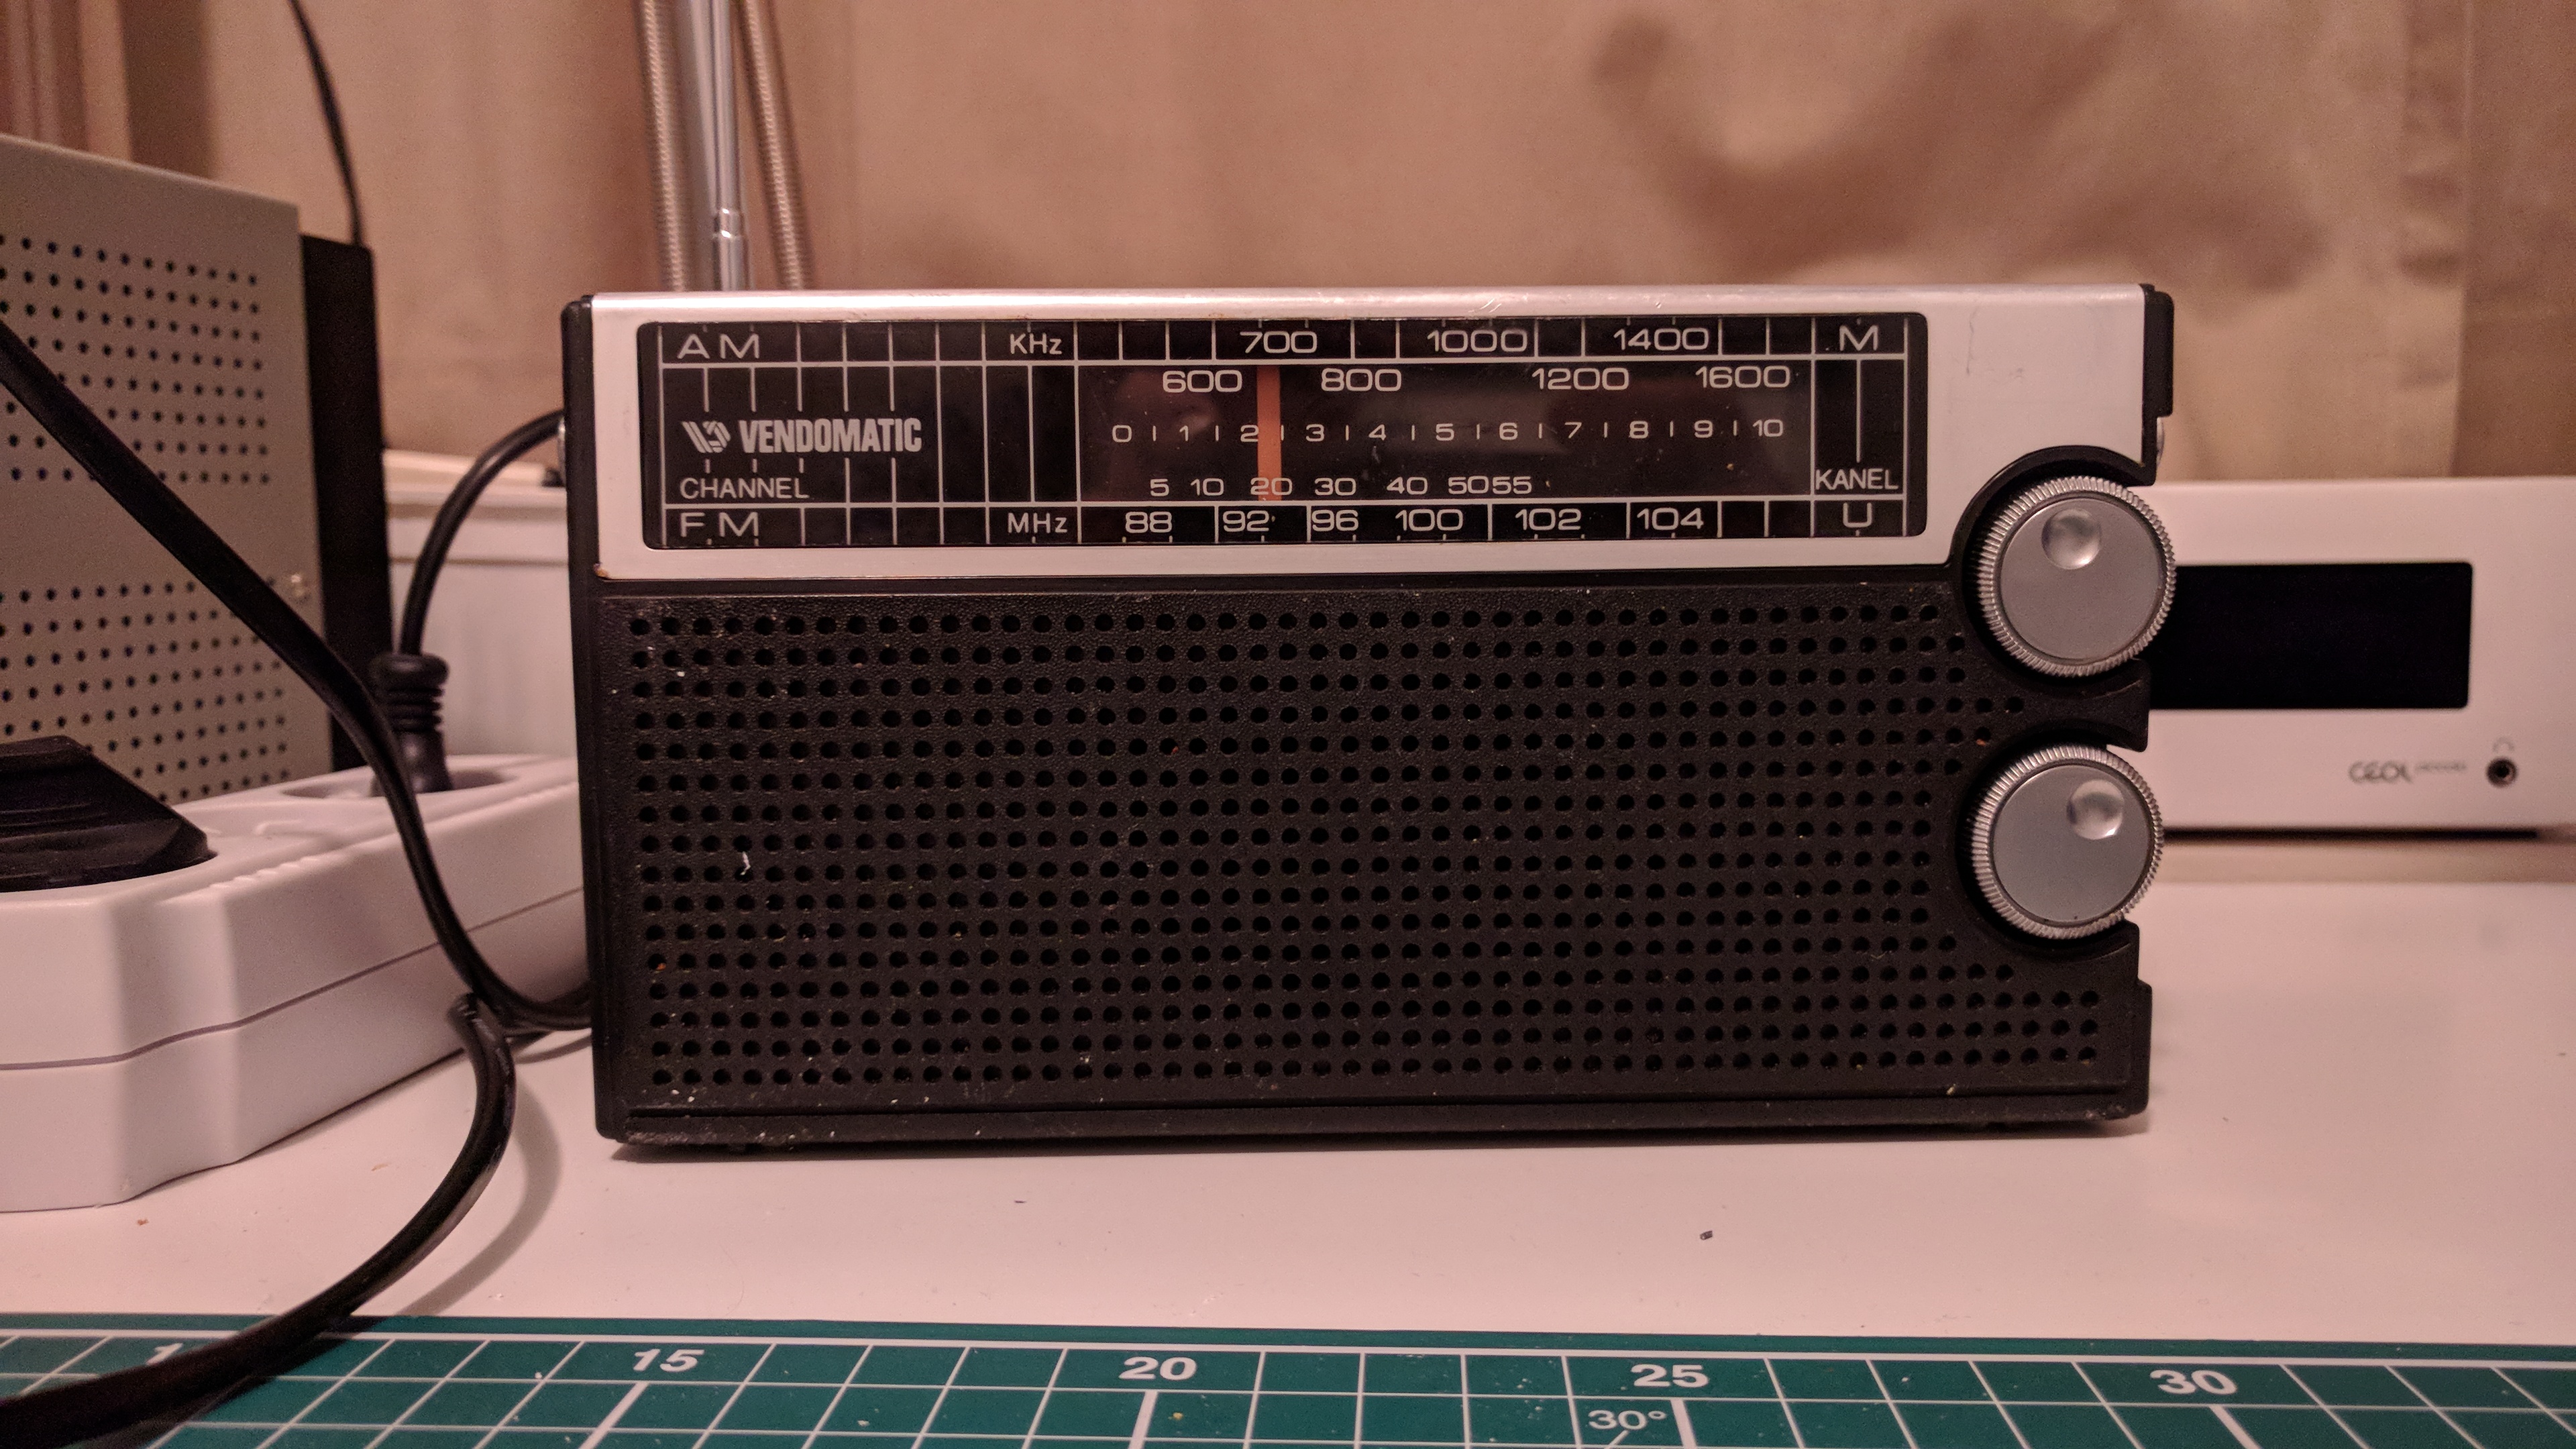
I gave new life to an old Vendomatic FM/AM transitor radio of at least 30 years by replacing the electronics with Raspberry Pi Zer0 W to make it a Wi-Fi connected digital music player. It plays music from internet radio stations, from my local NAS using DLNA, and it even plays music from Spotify. I wanted to make it look as original as possible. Fom the outside you can't see it has been hacked. First I removed the old transformer and all the componentsfrom the PCB to give a flat surface to mount the new electronics to. Then I added a AC to USB power adapter, I had to use a saw to make it fit. Then I added the Raspberry Pi and mounted it using tie wraps, and not hot glue because that may melt when the radio heats up in the sun. The Rapsberry Pi was placed such that I could acces the SD card from a hole in the battery compartment behind the cover. I connected a cheap USB soundcard using a very tiny micro USB to female USB A plug. I used a 3.5mm audio connector and two 4k7 series resistor to turn the stereo signal into mono, which in turn I wired to a 1 channel 2.5W class D amplifier (Adafruit PAM8302). The amplifier was powered from 5V from the Raspberry Pi. I found the original speaker was broken, that was probably the reason the old radio stopped working in the passed. The old 0.5W speaker was replaced by a 4W Visaton speaker (Visaton SC 5.9 ND). I tried re-using the original power/volume dial but I could not get the volume control to work so well and I didn't bother to replace the original potentiometer with a new one. The tuning dial is still shifting the frequency indicator but it is not function.
Finally I put open source software Volumio on the SD card in the Raspberry Pi. It's great, because it automatically sets up an hotspot so you can easily set the credentials for the Wi-Fi network. After that setting up Volumio is easy; you just need to go to a webpage using the local web address http://volumio.local and follow the setup guide. Volumio is great because it automatically detects music from my NAS using DLNA. The radio can be controlled from an app on a mobile device or from a webpage in the local network. I installed a AutoPlay plugin so it automatically starts playing internet radio on power-on. There's a cool GPIO plugin available for Volumio, so you can connect push buttons for basic on/off, volume, play/pause, prev/next control. I did not implent the push buttons because I wanted the radio to look original, besides the radio can be controlled from a mobile device anyway. I have also tried other open source software like pimusicbox but I found Volumio easiest to use, especially with setting up the Wifi connection. The USB sound card does not have the best audio quality but that's OK because the wideband speaker isn't great either and the radio still sounds lo-fi as before, or slightly better.
Electronic Load R2
2017
This the second revision of my electronic load (R1 here). It is intended for testing DC power supplies, solar panels and battery capacity. The hardware and Arduino code is open source. The software is made by my brother Bertrik. This revision is a much cheaper design than R1. The Arduino Nano was upgraded to a STM32 Arduino compatible board and as a result the resolution to measure voltage and current has improved much. It works up to 19.8V, 5A and 22W. The load can be set to constant current, constant power, or constant resistance by simply typing it into the Arduino serial monitor. The constant current loop is implemtented in hardware by an opamp, a mosfet, and a small current sense resistor. For setting the current a 16-bits timer is used to generate a PWM signal, that is low pas filtered to make it an analog input signal for the constant current circuit. The constant power and constant resistance mode is implemented in software. Load voltage and current are measured using a pair of opamp circuits and the STM32 12-bits ADC. Battery capacity is measured by loading the battery and integrating the current over time. To protect the battery against undervoltage the load is removed when the voltage falls below a configurable threshold. The device can also be used to simply log a voltage over time.


Specifications (typical, 25 degrees Celsius)
Current set range: 0.006 to 5 A dc
Current set resolution: 10-bit, 4.88 mA/bit
Current read range: 0.09 to 5 A dc
Current read resolution: 12-bit, 1.22 mA/bit
Voltage read range : 0.36 to 19.8 V dc
Voltage read resolution: 12-bit, 4.83 mV/bit
Power dissipation : 22 Watt max (natural convection)
Microcontroller: STM32F103C8T6 ARM Cortex-M3 (blue pill)
Power supply: micro USB cable (not included)
Load connector: screw terminal 2 pins 5.08mm pitch for 24-12 AWG
Net Weight: 70g
Size: 79*53*49 mm, 3.2*2.1*2.0inch (l*w*h)
Quik start
- Connect power supply + and - to the electronic load
- Connect USB cable to the computer
- Start Arduino IDE
- Select the COM port (115200bps)
- Open Arduino Serial Monitor
- Type any of the commands below into Serial Monitor
Every second the voltage, current, power and mAh are printed to the serial port
Serial Monitor Commands
Type CC 100 to set a constant current of 100 mA
Type CP 100 to set a constant power of 100 mW
Type CR 100 to set a constant resistance of 100 Ohm
Type V 1000 to set the load undervoltage limit to 1V
Type help for more commands
Storing the data
Arduino Serial Monitor is not able to store the serial port data. I recommend using Realterm because it can store the data in a file and add a timestamp for further processing in other tools, for example in a spreadsheet.
Testing a power supply
Constant voltage power supplies can be tested by applying different loads and see how the voltage is affected. It may also be used to test a dc-dc converter efficiency under different loads. For example type cc 100 in the serial monitor and you will see the the current being set and the voltage updating at regular interval. Soon pulsed loads will be supported in embedded code.
Testing a solar panel
Solar panels generate most power at a certain voltage, the maximum power voltage, Vmp. The Vmp can be found in the IV-curve of a solar panel, which is the current versus the voltage. You can manually apply different loads but the solar radiation may change during testing. To avoid these variations we plan to make embedded code that quickly tests the solar panel in a second or so.
Testing a thermal electric generator
TEG's generate most power at a certain current, the maximum power current, Imp. The Imp can be found in the IV-curve of a TEG, which is the current versus the voltage. This device is ideal for finding the Imp.
Testing batteries
Battery capacity is usually indicated in mAh (milliamphours) which is the load current in mA multiplied by the time in hours. This electronic load is ideally suited for battery testing. It can test a battery under constant current, constant power and constant resistance, exactly the three ways capacity is indicated in the battery's datasheet. But be careful. The voltage must not drop too low otherwise the battery gets damaged permanently. You first need to type the stop voltage "v 1000" (it stops at 1000 mV) and then "cc100" to start the measurement under a load of 100mA.
We plan to make software to test battery internal resistance. That may be an indicator for the battery life time. It will shortly test the voltage at two currents (4 and 5A) and calculate the internal resistance from that.
Software
The software is free and open source and published by my brother Bertrik on https://revspace.nl/ElectronicLoadR2.
Hardware
Hardware is open source and it is published on https://github.com/jrsikken/ElectronicLoadR2